 Recently my work has hung in two art galleries that could not use the slat and sleeve system for hanging quilts. I have used the system in the photo at left that simply runs a wire through the slat. Then the wire is stapled to the slat through the sleeve. This keeps the wire from showing above the quilt.
In this case, one of my pieces was on loan from its owner, so I did not want to put staples into the quilt sleeve.
I had heard of quilters using a velcro system and wanted to experiment with that. My newest pieces did not have sleeves, older work did. Being a bit lazy, I wanted a system that would work for both.
I purchased 3/4" velco and 1 1/4" twill tape in several colors to blend with the backs. I machine sewed the soft side of the velcro down the middle of the twill tape in long strips. Once sewn, I cut it into 4" strips.
Since the Walker System for my solo show had a 5" wide metal bar that was about 3" high, I hand sewed velcro strips to the bottom of the sleeves or about 4 inches below the top of the quilt. This ensured that the Walker System would not show above the quilts. It also allowed the slats to go through the 4" sleeves for other uses.
 My DH lined up short strips of the hook side of the velcro on the slats to match the placement on the quilts. He glued the velcro to the slats; once dry he stapled the velcro to the slats for extra security. See photo 2.
The dear man is very precise. He wanted a really slick presentation.
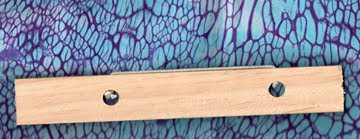
At the center of the slats, he drilled large holes 6.5" apart through the slat face. He then drilled a small hole from the top of the slat through to the large hole.
 This photo shows the details of the slat with its drilled holes, cord and knots. Once the holes were drilled, he threaded a strong, non-stretching cord through the holes and tied knots inside each large hole. He then hit each knot with glue. Once dry, he cut the cords short to be inside the slat.
The system worked beautifully. See the former post about my solo show to see some of work hung in this manner. Let me know if you have questions or need more information about this system.
Keep Quilting -
Nancy


